
Holy smokes, I’m in Amsterdam! I’m here visiting my sister!
We’re going on some little organic gardening adventures while I’m here, to get everything we need to do some organic container gardening.
And we’re going to take you with us. I’m super excited!
I’ll be posting a new short video every day for 12 or so days, to give you some useful container gardening ideas.
Please share this on facebook, twitter, etc. by using the buttons up above the photo. I really want people to join us!
By the time we’re done, you’ll have a step-by-step guide so you can easily set up an organic container garden yourself.
Click for video transcription
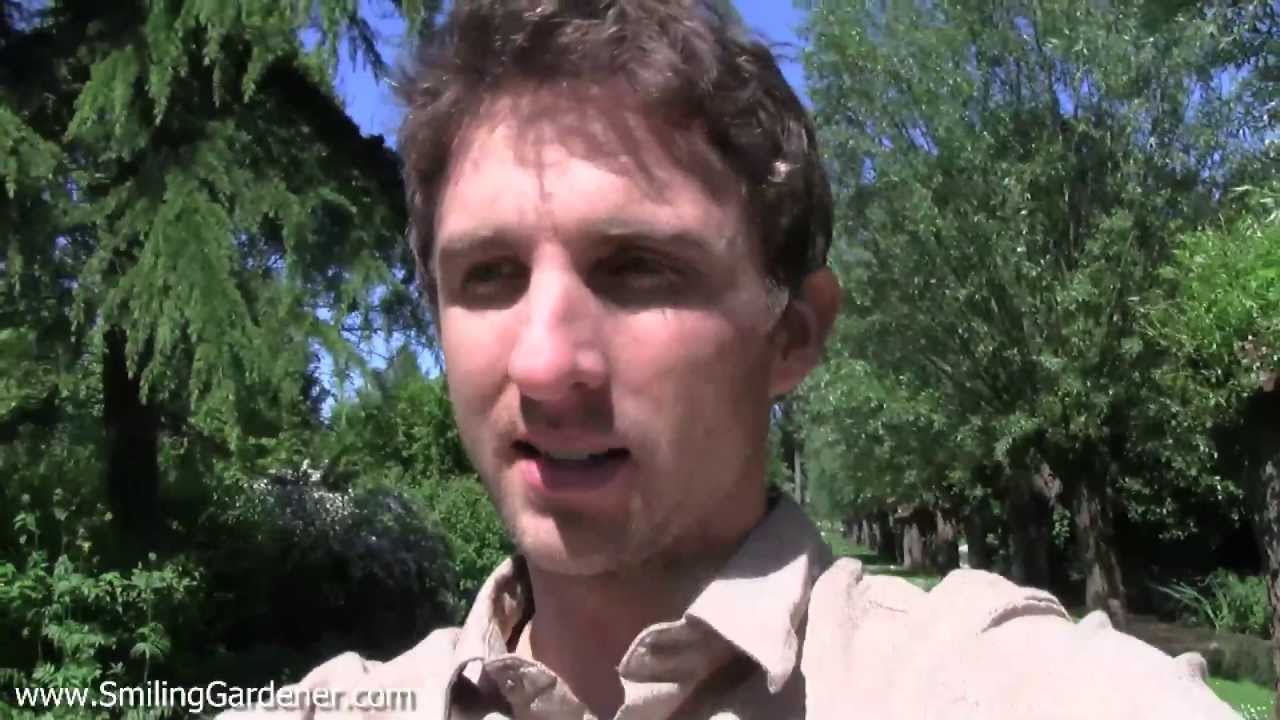
Phil: This is Amsterdam.
H: It’s Amsterdam.
Phil: This is Amsterdam.
Hey guys it’s Phil from smilinggardener.com and beside me I have.
H: H, Phil’s sister.
Phil: And we are in
H: Amsterdam.
Phil: They often meet people at parties or at events and tell them what I do which is to teach people about organic gardening and growing food. I do this though a website, it is called smilinggardener.com, it’s more for people who have gardens, where they really want to put in the work to grow really nutrient dense food but I always wish I had something to share with them, that will just a little bit easier, just for a casual gardener to do. So that’s what we are going to be doing today.
H: Doing container gardening, so urb gardening for if you don’t have a big garden, if you live in an apartment or live in the city and you just have a small space.
Phil: Everything you have to do is setup, even if it’s just one container or a few containers, it could be in your house or it could be on your balcony, getting your container, getting potting soil, getting plants, fertilizer, water and planting it, maintaining it, harvesting it all that. So whole bunch of maybe like it does in videos [indiscernible 01:13] I could live in nature.
H: Beautiful, I would live in that, so today we are going to go over to the [indiscernible 01:18] which is the local garden center here and we are going to take a look at what they have and what we need in order to put together some container gardens.
Phil: If you are on my website on this page or if you are on YouTube or Facebook you can click a link and go over and there will be text and videos, step by step instructions for how to setup these containers, so it’s going to be fun.
H: Yeah.
We’ll keep it simple, but we’re also going to teach you how to do a great job, which means doing a few things most people don’t take the time to do.
By the way, the reason I decided to do this is because I regularly meet people who are excited to check out this website when I tell them about it…
But I often feel the site probably isn’t ideal for the average person because I focus more on rather involved gardening techniques in order to grow highly nutrient-dense food…
So this page is my little gift to anyone who has a sunny window where they could set up a simple container garden, even if it’s just 1 or 2 containers.
I’ve also put the videos up on youtube and facebook, where you can subscribe to get notified of all new videos I do.
Choosing A Good Container
Click for video transcription
H: We are at back of my dormitory of my University, we are here today to talk about pots, no not that kind of pot, containers. Why don’t you tell the good people what they should look for when they are choosing out container for gardening?
Phil: Well I mean there are so many different options for the material but if you just keep it simple and get something that is nontoxic especially if you are growing food, you don’t want toxins to be going into your food and that should have drainage holes because when you water; otherwise it’s gonna get too wet, so you need to have drainage holes.
H: There is a river and some swans.
Phil: What I want to talk about the main ones people use, first of which is like a clay pot, terracotta pot; you can get them either glazed or unglazed. Unglazed they have a very natural kind of finish, the nice thing about them is, it’s gonna be a lot of air going into your roots. The problem with that is, I mean you don’t have to water more frequently because they are very porous. If you get a glazed terracotta pot, I will show you some of them that are really nice, I mean they can be painted very nice but that’s going to block some of the airflow, that means it’s gonna to hold water better, it’s also you gonna need a lighter soil mix to make sure there is enough air getting in there, so that’s when you want to use some more perlite. The other main one, people would use, so there was a clay. The other one is a plastic one which is often kind of looks like the clay but it is made of plastic. It’s a lot lighter, it’s going to be nonporous, so it even needs a lighter mix. It’s gonna hold a lot of water. If it’s a dark colored pot, it’s gonna get very hot, if it’s outside.
H: What if your pots are inside, where is the water going to drain to?
Phil: Good question, a tray next. The other thing you want is some kind of a tray on the bottom especially if it’s inside, a tray to capture that and you can be like a terracotta tray or could be just a plastic tray, good enough.
H: I think so, we have a little community garden here at the dormitory and we found these pots that are full of some plants right now but we thought why not go ahead and reuse them, not it is setting there, so we have yeah a couple of terracotta plastic. We will have nice drainage holes.
Phil: And they are big enough, a lot of people will try to plant there little herbs into like a little yogurt container or something which is kind of cute and looks cool but those roots are gonna run out of space really fast and so you want something bigger, so that the roots have a chance to expand and that allows the top to expand. Okay, cut.
No, we’re not on any kind of Amsterdam drugs in this video or any other video – we just make each other laugh like siblings do.
There are hundreds of items you can use as containers for gardening. Just make sure it’s sturdy, non-toxic and has drainage.
And the bigger the better, because those roots need all the room they can get.
So when you plant your herb, it should look a little too small for the container, because it needs room to grow.
Here are the main kinds of pots we usually see in a garden center:
- Unglazed terracotta/ceramics are very porous, so they let lots of air into the roots and allow them to stay cool, but also need frequent watering and can’t take much frost or they may break or at least harm plant roots.
- Glazed terracotta/ceramics are similar, but hold more water and less air, so you may need a lighter soil mix, such as one with perlite. Some of them can take frost, although if they have soil in them, they can still crack.
- Plastic containers can get very hot, especially dark ones. They don’t allow for airflow and they stay very wet, so you need a very porous mix that allows for airflow and drainage. Some of them are made with toxic chemicals. Metal containers behave similar to plastic.
In recent years there are more and more environmentally-friendly containers made of various kinds of plant fiber or plastic.
You’ll probably want a plant tray to catch the water that drains out the bottom of each container in your organic container gardening setup.
Potting Mix
Click for video transcription
H: How would you choose a potting mix?
Phil: If possible just get something organic and they are all going to be fairly similar but like it’s organic it wouldn’t have chemicals in it, you wouldn’t have sewage sledge in it. it’s gonna probably have some [indiscernible 00:23] even though that’s not ideal but hopefully I will have some compost in it and maybe some [indiscernible 00:28] to allow more air in there. You don’t want to use straight soil because it’s gonna be too heavy and not enough air in there, so just get an organic potting mix. People are playing soccer.
You can make your own by going and buying some compost and some top soil and some sand maybe some [indiscernible 00:48] those are the main four but if you just getting, making a few containers like we are today, mix a lot more [indiscernible 00: 55] to buy some potty mix, preferable if you can get organic and might say OMRI listed, OMIR listed or it might be certified by another organic agency, that way you know you are really getting something organic, [indiscernible 01:06] which we don’t really want because [indiscernible 01:10] are very important ecosystems that we would rather not be touching and more harvesting them too quickly and we are not restoring them which is difficult to do anyway, but even if you do get an organic mix, you might have to get [indiscernible 01:20]. So you are filling up our pots.
H: Yeah.
Phil: So we in the garden center today we had a lot of choice but it wall in Dutch which H can read a little bit but they didn’t list the ingredients, so we didn’t know exactly what was in there. In this case we already had like the dormitory here, already had our bags so we are using it and if you look at it, it looks to me like it has compost and [indiscernible 01:43] test. If the potty mix doesn’t have any lime in it, if you happen to have any lime that will bring up the calcium level, if you have calcitic lime or we will bright up the magnesium and calcium level if you have dolomite lime, doesn’t really matter to me what you use for that. Now I would use about 1% calcium, so your mix is you known just use 1% of the mix as calcium. The other thing is if you have, this is again more advanced and it’s a little bit of work to find this, but gardeners who are organic and now into kind of thing we might be able to find it, that’s rock dust, either a glacial rock dust or a volcanic rock dust. Bring about 5% of your mix as a rock dust and that will bring all kinds of minerals in there, so that you plant has the minerals. It needs to become healthy and nutritious for you, good.
H: I think that’s great.
You can make your own organic container gardening soil mix, but it doesn’t really make sense unless you’re doing a lot of potting.
So buying some is probably your best bet.
If possible, get something that’s certified organic. It may have an OMRI Listed symbol on the package or another certification.
That means it won’t contain chemicals and sewage sludge and other yucky stuff.
Try to find one with lots of compost in it, or if you really want to do a good job, find some quality compost in your area and make it 1/3 of the mix.
Perhaps you can find some worm compost, as it’s usually very good stuff.
I mostly stay away from peat and coir for environmental reasons, but most potting mixes do have peat, even organic ones, so sometimes you’ll have to use it.
While a basic organic potting mix is fine, I like to spruce it up a bit in order to grow more nutrition herbs.
So if I have glacial or volcanic rock dust, I will make it up to 5% of the mix. If the mix doesn’t have lime, I will add some calcitic lime or dolomite lime so it’s 1% of the mix.
Buying Plants
Click for video transcription
Phil: Now it’s time for plants and what I think we should grow these herbs because we can just herb, I like herbs because you harvest a little everyday, if you try to plant a vegetable you are going to run out very quickly and many vegetables prefer a bigger soil environment but herbs are great. Don’t bother starting from seed because for many herbs you going to wait a couple of weeks for that seed to germinate, it’s a big you need extra gear and start, so yeah just buy plants whatever looks healthy, whatever you are going to use.
H: You want to make sure that your plants look healthy so that’s no pest, there is no 00:47, there is no white flies, you don’t see any insects on it, no moles, no mildews, no fungus. You want to pick a plant that just looks fairly robust, so looks fairly full. When they looks like it’s been watered well.
Phil: Yeah because I often notice just the ones on the corners or the ones in the middle or whatever, sometimes you don’t get the water, so if you go in and see it’s bone dry, maybe hasn’t been watered for awhile, just get one that is nice and wet.
H: Yeah looks like it been cared for. You want to go like this, like brother and sister, what’s that thing that people use to.
P: Do I end the shot.
H: No
P: I can tell.
H: Yeah.
P: Oh, am I in the middle.
H: Yeah, look at my foots over here.
P: Oh, good. We want to get one that 1:30 use.
H: Yeah, so we chose today we got some parsley, some dough here and basal. Just things that we thought we would enjoy eating. So you can grow time, dough would be great, oregano Chives, basal, those are all great for full son.
P: If you have more shade, I think some of the one you can do a bit of better in shape would be like the parsley to take it.
H: Yeah
P: I think chives can go pretty much anywhere, that pretty easy
H: Lemon balm.
P: Lemon balm, mint. Mint is really nice to grow in a park because you don’t eat, lot of us we don’t to put it in our garden because it’s spread all over the place. So if you put in a pot you can keep the contain.
H: I think we said enough.
P: Okay.
H: Okay.
Most organic container garden food plants could be started from seed.
But to me, if you’re just planting a few containers, it makes sense to just buy them.
It’s nice if you can find organically grown plants, but that’s difficult in a lot of places, so don’t worry, you don’t have to sweat it – you’ll take care of them organically and that’s fine.
Take a look at the plant in the garden center to make sure it looks healthy. It shouldn’t have any disease or insect predators. The potting soil should be wet.
As for which herbs to grow, most all of them will work in pots, so grow the ones you use the most. I’m not going to make a long list here, because you can try any of them.
If I have lots of sun, I like to grow things like basil, thyme, cilantro and dill.
If I have to live with shade, some of the herbs that seem to be able to take it are parsley, lemon balm, mint and chives.
Microbial Inoculants
Click for video transcription
H: Let’s talk about plants.
PHIL: Okay.
H: You do the talking, I will do the listening.
Phil: When you are growing plants in containers especially when they are inside, it’s a very unnatural environment for them. They don’t have their microbial partners in the soil and it’s even the case in our gardens because of pesticide used or just air pollution or tilling are all kinds of things we often have lower bacteria and fungi than we want and so we always are trying to improve that as organic gardeners and the main way to do that is good compost.
If you can find that, now that’s hard to find and hard to decide for that but if you have some locally made worm compost that’s usually very nutritious, like those in your soil, it has nutrients but also has beneficial microorganisms to establish that soil ecosystem. They protect your plants from disease and even from some insects by being right all around the root zone and all over the leaves and being like a first line of defense up there.
The other thing we do is, we feed nutrients to your plants and then the plants feed them carbohydrates in returns with this bartering system than happen, so your plants really get protection and food and water, especially a lot of the conventional party mixes even organic ones becomes sterile. We want to reintroduce these microorganisms, so one way to do that is to bring some compost in worm compost is really great, if you can find some in your area or you can make some itself, there is also another one I really love called effective microorganisms and it’s a liquid you buy from amazon.com or other places online and you mix it with water sprayed on your plants and on the roots and on to like on the soil and the leaves, it inoculates them with these beneficial microorganisms and it’s basically a liquid.
It just really like less than 20 different species of mostly bacteria provide amazing benefits for plants and what you do is you spray them onto the plants, our spray bottle isn’t working, so you are going to be spray, that’s your contribution to the video.
H: I went to university.
Phil: And you can get a bottle for say 20 to 25 dollars or sometimes even less on amazon and the results are incredible and their other usage for humans that I am not going to get into today but this is the one thing I recommend people do even before fertilizing, we are going to talk about fertilizing in the next video and that’s all for this one.
H: That’s all folks.
One of the difficulties with growing an organic container gardening is that it’s quite an unnatural environment for the plants. That’s even more true indoors.
They don’t have most of the beneficial microorganisms they would normally partner with in nature.
It’s these organisms that protect plants from insect predators like aphids and spider mites, and diseases like mildew.
And it’s these organisms that actually feed nutrients to plants, in exchange for food the plants give them in return.
That’s why I always try to provide some of these organisms. I do this in the garden, too, but I believe it’s especially important in containers.
Compost is the best inoculant, but it has to be good compost. Worm compost is one great option for organic containers.
But there’s even more we can do. My favorite is a product called Effective Microorganisms.
It’s a mix of fermenting microbes that you mix with water and then spray on the soil and leaves in order to inoculate everything.
This can make the difference between a pest-ridden, deficient plant and a vibrant, nutrient-dense plant. I know most people won’t go through the trouble, but those who do will often reap some big benefits.
Container Fertilizing
Click for video transcription
Phil: So we talk about fertilizers, how about you go first.
H: Okay, so first of all when you are picking a fertilizer you don’t want to in your garden center and pick up something like miracle grow. We don’t want to have the toxic chemicals particularly when we are spraying it on food plants. We personally don’t believe in supporting a company like Scott’s.
Phil: I am not a big fan of Scott’s.
H: Well, I am not a big fan of Scott’s even though they do some organic stuff, a lot of things like miracle grow fertilizers like this are big in macronutrients like NPK and is really interesting history of why conventional fertilizers focus on NPK but we want a more broad selection of nutrients, so we want trace minerals, micronutrients, all the other amazing things that fertilizer will do for us so.
Phil: We went to the garden center today and we were trying to, again we didn’t have ingredients on their fertilizer which is crazy, most I mean in North America, you are going to be able to read the ingredients, so you are gonna want to go for organic fertilizer but I am actually going to stir you away from going and buying just like a general purpose organic fertilizer.
H: What sort of fertilizers do you use?
Phil: Well my favorite is ocean water or if you don’t live by the ocean you can buy it a very concentrated low sodium chloride ocean water. It’s full of 80 plus trace minerals that have made their way into the ocean so it’s very good for getting broad spectrum nutrition, so if you need chromium in your life or molybdenum in your life you get into your soil onto your plants, eat those plants then you have nutrition. So it is that there is liquid [indiscernible 01:45] which is very similar, has lots of nutrients in it and then there is [indiscernible 01:50] growing up to us.
Nobody even know or tell me right now although, and there is like any kind of sugar molasses sugar, coca cola, all these things are great for us. Well, actually molasses is okay for us but the rest are not great for us they are actually just being onto your plants. So those are the main things I use. Now I am kind of health nut so you probably pretty much never drink coke.
I even had a coke for ever but if you have coke I don’t mind it as a fertilizer because it has sugar which feed the biology, feeds the microorganisms in the soil. It has phosphorus, it has carbon, so just I don’t know I have never figure out the ratio for containers but I would say mix it with 20 parts of water. So take a little bit of coke mix it with 20 times much water, water your plants with them and that’s going to provide a lot of food for the microbes which in turn are going to take that food and make available for plants.
Most people use things like Miracle Gro on their container gardens.
I’m going to steer you as far away from that as I can.
First, I don’t want toxic chemicals on my food.
Second, I don’t support Scotts, the makers of Miracle Gro, so I wouldn’t buy their organic stuff either.
Third, I want a much more balanced fertilizer, something that supplies all of the trace minerals my container plants need. In turn, I get those minerals when I eat my plants.
That’s where ocean water comes in. Research has been done on this for 50 years. The results of fertilizing with ocean water can be quite incredible. I’ve seen it myself.
You can easily get it if you don’t live by the ocean. You can buy it as a product where the ocean water has been concentrated. No need to worry about the salt.
Along the same lines, seaweed has been used for a long time as a fertilizer. It also has natural hormones which encourage plant growth. You can buy liquid kelp. I use it and ocean water, but you could choose one or the other.
Too lazy to go out and buy a fertilizer? Okay, just use a bit of molasses, or sugar, or even coca-cola. Yes, even coca-cola! I’m a bit of a health nut, so I haven’t had a Coke in many years and I don’t recommend it for people, but it’s actually great for plants. It supplies sugars and carbon and phosphorus to feed soil microbes.
Update: The year after we did this, I decided to start selling these fertilizer in the U.S., so you can now learn more about them here.
Container Planting
Click for video transcription
Phil: Okay, it’s time to plant.
H: I’m planting the basil.
Phil: Okay.
H: Okay.
Phil: I will take the dill.
H: Nope.
Phil: The parsley?
H: You take the parsley.
Phil: Okay. We’ve already added our soil.
H: Yup.
Phil: I think we can use a little more. I would usually – and I fill it pretty full because it tends to – when you water it tends to sink a bit. Or you can you know, fill it as full as you want, then water it down and add some more. But you want to leave a bit of a lip at the top for future watering right?
H: Yeah.
Phil: I water before I plant, but you’ll do it the opposite.
H: I’m going to do the opposite.
Phil: You don’t want to get all muddy?
H: I don’t want to get dirty. Take the plant out of the pot. Sometimes you have to give it a little squeeze if it’s really root-bound and it should just slip right out, you know, try and make sure it stays in one piece as you do that. And if you find that the roots are really root-bound like they are now, you want to give it a little bit of a cut, preferably with a sharp non-serrated knife, but we don’t have that here. So we’re just going to use our fingers.
Phil: Yeah, and it’s not horribly root-bound but just enough that you want to break it up a little bit. Then what I would like to do is come through with my spray, oh yeah, which if it doesn’t work, so you have to be it.
H: Shsh – Great, great. Okay.
Phil: So, effective microorganisms going on here, the sea minerals, liquid kelp, every fertilizer is mixed in it with water, spray under the root system while you have the chance here. Spray it on the top too, could be after you plant.
H: Yeah.
Phil: And then we plant these things.
H: Okay.
Phil: You want the top of the root ball to be level with the top of your soil.
H: Yeah.
Phil: That’s another reason I kind of like to water first, really doesn’t matter much but then I know my soil have settled and then –
H: So when you get the plant in there, you’re going to take some of the soil from around and really tuck it up against the existing root ball.
Phil: People often don’t want to – they like the idea of there being lots of air around the root ball – sorry I got to get on camera, but what you really do want to do is take your fingers and make sure the soil comes right up to the roots because the roots need that soil. A baby could do it if their fingers were more agile.
H: If they were older –
Phil: Yeah.
Finally time to plant this organic container garden!
Fill your container with potting mix.
Water it in and it will settle, so add more potting mix and water that in.
Leave an inch or so of room at the top of the pot to make future watering easier.
Gently take your plant out of the pot and spray the roots with any microbial inoculants and organic fertilizers you may be using.
Plant it so the top of the root ball is level with the top of the soil. Spray the leaves with your liquid goodness, too.
A mulch will help conserve moisture and keep the roots a bit cooler. You don’t have to go crazy trying to find some, but if you can get your hands on a few leaves, they’re the best because they slowly feed the soil. Even some stones are a start, because they at least decrease evaporation.
Container Watering
Click for video transcription
H: Welcome to the office of redundancy office.
Phil: If you do any one thing, I would say water. Just make sure you are watering properly, which is not too much and not too little. I think so many problems, especially with indoor container plants is either over or under watering. So just stick your finger into the soil, see how wet it is down an inch down in there and then if it’s not wet enough, you water it and then you’re good to go. Water it.
H: Great. Now with herb pots, we can’t really generalize and say you should water once a week or three times a week because it’s going to entirely depend on the location of the plants, how much sun they’re getting, what type of pot they’re in, humidity in your house, these sorts of things.
Phil: Sometimes it will dry – on top and you’ll think you have to water, so if you put it down in there just a little bit, you’ll see if it’s wet inside. But we do want to dry out a little bit – just because if it stays wet all the time, there’s maybe not enough air in there or it’s easier for disease to kind of get hold. So if you let it dry it a little bit and then water.
H: As you get more used to looking at your plants, you’ll be able to develop a bit of a green thumb and maybe even tell by the leaves how they love to see if the plants need water.
Phil: Hopefully, it doesn’t get to the point where they are totally wet you know.
H: That’s true, yeah.
Phil: And that’s a bit –. So we have these containers, these little trays underneath the pot, I think you can probably see them and they are going to catch the water. You can certainly use your tap water but if you happen to have like rain water or – I actually got this water from a pond nearby, it’s going to be very – it’s going to have a lot of nutrition in it, a lot of microorganisms as long as it’s from a clean pond and it’s nice to do that instead of a chlorine water from a tap or if you can de-chlorinate it somehow, that’s just a bonus step, you don’t have to do that, but —
H: Make sure that the water is coming out of the drainage holes in the bottom of the pot, that way you know you’re really soaking the root ball. If the water isn’t coming out of the bottom of the pot, perhaps you need to give a little bit more.
Phil: I can see into your washroom from my washroom.
Now there’s just one thing you absolutely have to do.
Water.
I won’t give you a schedule, because it depends on many factors.
Basically, it’s good to let the soil dry out a little between waterings, in order to encourage the roots to travel a little further, and to discourage disease.
But other than that, water is key.
The way to know when to water is to put your finger an inch down into the container soil and feel it. If it’s dry, it’s time to water.
With a watering can, water until it comes out the bottom of the pot.
Dealing With Pests
Click for video transcription
Phil: Pretty good number of bikes.
H: Thousands. You better remember to put a red ribbon on yours or else you’ll never find it. Why don’t you talk about controlling pests?
Phil: The main way we do that is just by preventing them. So all these things I talk about like using compost and rock dust and calcitic lime and sea ocean water, kelp fertilizer, molasses, effective microorganisms, anything we can do, even proper watering to create a healthy plant that’s going to cause pests to go elsewhere because pests only go after unhealthy plants. So mainly, that’s the thing I do, yeah.
H: Cool.
Phil: But I’m going to give you three different recipes today. Would you like some pancakes with your sugar? If you get some kind of soft body insect like Aphids or Whiteflies, things are common especially on – in containers inside because it’s such an unnatural environment. There is something you can make up. Actually, one of the first things I often do when I get that is come through with my effective microorganisms because again, sometimes that’s just boosting the plant off like that will help get rid of those.
But what you can do is you can make a homemade insecticide by taking a clove of garlic and crushing it into anything and then about a half-a-teaspoon of any kind of mineral oil or vegetable oil, stir them up really well and let that marinate for at least 24 hours, then to even make it more effective, you can put in some kind of insecticidal soap or just dish soap. As long as you have something that’s kind of clean and nontoxic like Dr. Bronner’s or – this is like a veggie wash soap.
So just a half-a-teaspoon of that, again, I don’t really, measure, it’s not that important. And then a quarter drop of water and that is ready to go. When you’re actually ready to spray, this can be mixed in another liter of water and you probably don’t need that much, so you can keep this for maybe a week or so if you want to keep it for awhile. But I’ll mix that in a liter of water, put it into a spray bottle and spray it onto the leaves on your plant.
IF you get any kind of disease like powdery mildew or some kind of wilt, something that can work really well is baking soda. So if you just put a teaspoon of baking soda and with a liter of water, I’m not going to put the whole liter in but – and spray that onto your plants and again the efficacy of this is improved if you used like half-a-teaspoon of soap. I think what the soap – soap is pesticidal but it also helps these things stick to the plant leaves so that it actually stays there for awhile. Something I often use instead of soap is molasses. It doesn’t have the pesticidal properties but it’s full of nutrition and carving to feed the beneficial microorganisms. So I often do that, plus it helps with the sticking. So that’s how you make that.
So the bottom-line is if you have healthy plants, they’re not going to get troubled by pests, so that’s why I’m always spraying these beneficial effective microorganisms, sea minerals, even molasses, coca-cola, whatever it is, that could help. Then you have this garlic thing, you can use if you really need it. You have this baking soda thing, you can use if you really need it. Always come after a day later with some beneficial biostimulants and effective microorganisms.
By preparing the soil well in our organic container gsrden – using compost, rock dust, microbial inoculants and fertilizers – we’ve gone a long way to preventing pests.
That’s because pests only go after unhealthy plants.
I’m not going to get too much into it here, but that’s the way it is.
You should spray your plant regularly (monthly or even weekly) with EM and one of the liquid fertilizers I mentioned, in order to keep its health up, which will keep pests away.
But be careful not to over-fertilize – I’ve done it several times and it ain’t pretty.
If you get soft-bodied insects like aphids, you can make a mixture of garlic and soap and water. Crush 1 medium clove of garlic and marinate it in 1/2 tsp of mineral/vegetable oil for at least 24 hours. Then add 1/2 tsp of soap and mix well in 1/4 cup of water. When it’s time to spray, dilute this again in 1 liter of water and spray on the plants in the morning. The garlic, oil and soap all have their own insecticidal properties, and they work on some fungal diseases, too.
The garlic can work pretty well, but it doesn’t fix the reason the pests were there in the first place, which is lack of plant health, so be sure to try to improve that. I always come back through with EM a day after I spray this stuff, in order to repopulate the leaf surface with the good guys.
Maintenance And Harvesting
Click for video transcription
Phil: Now we’re talking about maintenance and harvesting of your plants. We just have a few quick tips. The first one is location. Make sure you put them for the most part herbs in your sunniest window and even during the warmer part of the year, if you have a balcony or if you can put them outside, that’s going to be better, more sun for them and more natural. So that’s going to be key for their health. Let’s just keep it on sunny.
H: Make sure when you have them in that place, you’re watering them. So we have a video about watering but yeah, make sure you water.
Phil: Oh yeah, you weren’t going to talk about location. Okay, do you want to start it again?
H: No, it’s okay. You did a good job.
Phil: Okay, so watering, number two and the big one. Third is to scum and spray weekly or monthly with whatever you decide to get. It could be effective microorganisms – I’ve said this a few times with effective microorganisms, some kind of organic fertilizer, even just spraying with molasses and mixed in water just to keep them healthy, keep them with nutrients.
H: Yup.
Phil: Your leave is opening up – that’s funny – and then you want to talk about harvesting, it’s a little backwards.
H: And then the last thing just to harvest —
Phil: I mean right now they look kind of funny right?
H: Yeah. Okay, so they’re a little bit small. We put this little mulch around it. Can they see that there?
Phil: I can point the camera down a little bit.
H: Yeah, alright. So we put this little mulch around it, now the plants are looking quite small but my dilly, they really puff up and totally fill up the pot.
Phil: Yeah, within a month or two they’ll be big.
H: Yeah. And then what you’re going to do is just harvest the herbs or whatever you’re growing whenever you’re ready. So take your snips, just go down to the stem there, snip it and —
Phil: Pretty easy.
H: Umm, that’s really good.
Phil: You can start harvesting right away, but really like in a month, then you can harvest everyday and you won’t be using the whole plant.
H: Right, exactly.
Phil: That’s why herbs are nice.
H: Yeah.
Phil: So we did it.
H: Yeah.
Phil: Okay.
H: Cut –. Right in front here, is the Concert hall. They have symphonies, operas, that kind of big show there. Directly in front of us is the Van Gogh Museum and it’s just reopened, began after a little bit of construction, beautiful – museum and that is also a beautiful big museum, many exhibitions, many halls, you could spend a day in there.
If you’re growing herbs or any kind of organic container vegetable gardening, most plants will prefer full sun, so that’s where your containers should go if possible.
But if you only have a bit of sun, that can work okay, too.
Outside is better than inside during the warmer part of the year, as it’s just a more natural environment for them.
But inside can work if you have a sunny window and some decent airflow to prevent disease.
Near the kitchen is awesome because you’ll have a water source right there and your herbs will be right where you need them.
For maintenance, optionally spray your inoculant and liquid fertilizer monthly or weekly.
And most important, water when it gets dry.
The plants will take a little while to get growing. They have to get comfy in the container first.
But eventually, they will shoot up and you can begin harvesting.
Use scissors for that. Cut a branch back down to where other branchlets come off it, or down at the stem.
Conclusion!
Click for video transcription
H: Let’s do this.
Phil: Okay.
H: You look tall.
Phil: I know. That’s what I said the other day. So I think it’s been about nine days or so since we planted these and if you take a look, you can see they’re growing already and it’s kind of happening how you would think it would happen. The parsley seems to take longer to get going, same when you’re starting parsley from a seed, it takes a long time to germinate. But the basil is coming up nicely and the dill is coming up nicely. And there are just a couple of quick things I want to talk about here in this conclusion. First is a quick summary of what we did.
So, if I can remember, we want to get containers that have drainage and that are made from nontoxic materials, we want to get potting mix that is organic and hopefully have some good compost in it otherwise you can bring in some worm compost or some kind of nice organic compost. We want to get some plants that are organic if possible, but if not, that’s fine, you can just go buy some plants. Then, we want to think about microbial inoculants such as effective microorganisms and organic fertilizers — I guess I don’t have any props, such as sea minerals or liquid kelp or molasses and then we want to put all of these things together into a pot; green side up and then we just want to make sure we water very well, keep them healthy so they don’t get pest problems and then we can start harvesting fairly quickly. We’ve already been harvesting some of these things and that’s all, right? That’s what we talked about.
H: Yeah.
Phil: Good. Second, if you’re on my blog and you’ve actually made it to the bottom of this blog post and you’re watching this video, that means you’ve made through all of this. Ask any questions below or if you’re on Facebook, ask any questions, if you’re on YouTube, ask any questions, make sure you’ll like the page on Facebook or subscribe on YouTube because we’re going to do more videos like this in the future and that’s all. That’s the conclusion.
H: —
Phil: No, you already did that joke –
H: What?
Phil: You haven’t seen that video yet.
H: Great.
Phil: Oh, I’m leaving Amsterdam in two days.
H: Aw..
Phil: But you’re coming a few days later –
H: Yes.
Phil: And we might shoot some videos – you don’t know this yet, but we might shoot some videos back home.
H: I’ll check the contract first.
Phil: Okay. Cut it.
- Get a non-toxic container with drainage holes
- Get an organic potting mix
- Buy the herbs you want to eat
- Buy some EM1 or SCD Bio Ag online
- Buy some sea minerals or liquid kelp
- Plant your container garden
- Be sure to water when needed
- Keep plants healthy to prevent pests
- Eat
And definitely ask me any questions below about organic container gardening for beginners. Or leave a comment to add your container garden ideas to the discussion.
Or you can even upload a photo in the comments area below of your container gardening herbs or other plants.


I’m really looking forward to this. Although I’m doing your full program, and my kids are involved in that, I think my daughter especially will really like this so she can have it in the window of her bedroom. Thanks for all you do!
Excellent!
Hello
what organic containers do you suggest?
I don’t keep track of specific brands or anything. I tend to keep my eye out for used containers as much as possible. Other than that, I use all kinds – ceramic, wood, sometimes plastic.
Hi Phil. I just recently subscribed and am so glad to get your videos. I am intersted in the container gardening so I look forward to seeing the series. I don’t see the step by step list, so I need some help navigating the site. HELP!!
This step-by-step page will be built day by day as we make and post new videos.
You look very happy, and thank you for the generous sharing of your knowledge. Sandra
Thanks Sandra!
Awe I love this series! Your sister is too cute and now when I go to work in my garden I think I’ll do the little foot dance lol looking forward to the next video. Great information here! Thanks
Awesome!
I like the little foot dance, too. Very useful tips and lovely glimpses of Amsterdam. Thanks.
Thanks Phil, I’m glad I found your page. I have a question. How do you get rid of or control fungus knats? Thanks.
The most important is to let your plants dry out a bit between waterings, as the knats like wet soil. Other than that, you can try things like sprinkling diatomaceous earth or cinnamon, although that hurts beneficials, too. Or you can try drowning the knats in a cup of apple cider vinegar with a bit of soap, or buy some sticky traps. That could help.
Hi Phil, Living in Temecula, California and oregano is almost in bloom. When should I harvest the herb for the later year? Which is your easiest way to dry herbs? Haven’t seen this on video yet but looking forward to preparation of herbs.
With oregano and most herbs I like to harvest before flowering, before they get bitter. Then I hang the whole branches upside down inside, in a dry place. They get pretty dry in a week.
Hi Phil, Thank you so much for this container gardening series. It’s what I’ve been looking for, for a while. I live a 9th floor apartment in Lisbon, Portugal and have been trying over the past year to try to grow a little food in containers, organically on my small veranda. I have herbs and a few cherry tomatoes.I’ve seen a lot of your videos and wondered what I could apply of what you do in a garden to containers this series gave me a lot of guidelines I was looking for. I’m not sure where to find some of the elements you mention but I have pulverized some calcium supplements of mine, I’ve used molasses, and opened up capsules of acidophilis hoping that this will work as a biostimulant?. I worry about the salt in the sea water and how much sea water can one use in pots? The ocean is a 30 minute drive away So I will be bringing home a jug of it soon. Thank you so much for sharing all this information. BTW how long do cherry tomoatoes take to ripen? I’ve been loking at my green ones for a month and they look healthy but still very green.
I must say I really don’t know how much sea water to use on containers, as I have to buy the concentrated sea minerals products because I live inland, and with that kind of product there are specific guidelines. But I’ve done some math before and my guess is mix sea water with 50 parts water, and then water with that weekly.For your cherry tomatoes, you can mix apple cider vinegar, household ammonia, and water at a 2:1:60 ratio and spray that onto the leaves of the tomato plant. This could help it move over to ripening. The ammonia isn’t considered organic, but there’s a good chance it’s what your plant needs right now.
Is that one part sea water to 50 parts water?
Yes.
Phil, Whats your take on rock dust vs. the ocean water? Any preference here? Thanks!
I tend to prefer a concentrated ocean water because it is so easy to use, and because I once heard Arden Andersen make his case for why he likes it better (certainly more nutrients in it). That being said, I still prefer to use both if I have them.
Hi Phil, I recently had a problem with catapillars eating my beans,cucmber, and zucini’s, I tried almost all of the natural recipies out there to no avail, then used bt which is supposed to be organic, (but Im not so convinced) and it worked great. But what would you recommend?
Bt does have some negatives associated with it, so I wouldn’t use it long term. In the long term, you need to improve soil and plant health to the point where the caterpillars don’t cause problems. Improve soil fertility, organic matter, biology, etc. and pest problems gradually fade away. Ultimately, that’s what I try to teach in the various blog posts on this site, and of course in much more detail in the Academy.
Just found your blog and even though I have been an organic gardener for decades (yeah, really!), I learned several good tips here. And I looooved the mini tours of Amsterdam having been there last year. Was kinda nice to say “hey, I’ve been there…and there…and there!!” I’ll be back to your blog to learn more.
Glad you enjoyed it!
Hi Phil! Love your site! You’ve encouraged me to go the organic route this year & am excited to see how my plants fair, particularly my container grown Brugmansia & Plumeria, which did not fair well last season after using this fert called DynaGro 7-9-5 that had been highly suggested to me by another gardening forum. Prior to this, I had been using the dreaded MG on them along with F&SW emulsion once every wk & I did get many flushes of blooms but I always felt they were still lacking certain nutes that I knew the MG couldn’t supply. Since the DynaGro is supposed to have all the majors & minors, I thought it would be a boon to my plants. Not quite: my Brugs leaves were lush & green but they couldn’t hold any of their flower buds. They’d get about 1/4″ & then shrivel up & fall off. Any new growth after that was sparse. The Plumeria put on too much top growth because it never produced any inflos for blooms, which in turn creates necessary branching out, so now they’re tall & lanky. To say I was upset is putting it mildly. Since Brugs are notoriously heavy feeders, I was wondering if you could kindly suggest what I should feed them? The general consensus is to give them (& Plumeria) high doses of P “to encourage flower production” – but after reading your site about the infamous bloom boosters & too much P, that obviously isn’t the correct way to go either – though it seems the weaker varieties of ferts I used don’t seem to be able to supply enough of the nutes my particular plants require either. Any advice you could offer me would be greatly appreciated. Thank you & happy & successful gardening.
Perhaps adding some beneficial microorganisms to your routine would help, especially EM and mycorrhizal fungi. The fish and seaweed is a great thing to continue using. All of these products are available here ( https://www.smilinggardener.com/sale/organic-fertilizers/ ). Other than that, is it root bound? Does it need up-potting into a new potting soil?
Hi Phil. Thank you so much for your information. I am a first timer. And I am kind of excited to taste what food is supposed to taste like! 😋 I am 57 years old and disabled. Container gardening is really my only choice
Do you have any words of wisdom and/ or suggestions to help me? I’m starting with some basics; potatoes, onions, lettuce, broccoli, carrots, beans and tomatoes
Thank you again for everything!
I say just go for it. You’ll have successes and failures along the way and you’ll learn a lot as you go. Take notes on what works and what doesn’t 🙂
I thoroughly enjoyed this series. It’s past 1:00 am but I defied the sleep just to finish watching it. Although it deals with containers it gave me the grip I was looking for that I feel I can transfer to my regular gardening. I am beginning to feel more confident that I can accomplish my big goals.
Thanks so much for all this.
Evelyn