Making Compost
The last post was an intro to compost and now it’s time to make it.
There are many composting methods, but the most common is probably the outdoor, above-ground compost pile, and it’s a good method.
The size of the pile is important. Too small and it won’t heat up properly, but too big and it won’t get enough air. The best dimensions are three to five feet long, wide and high.
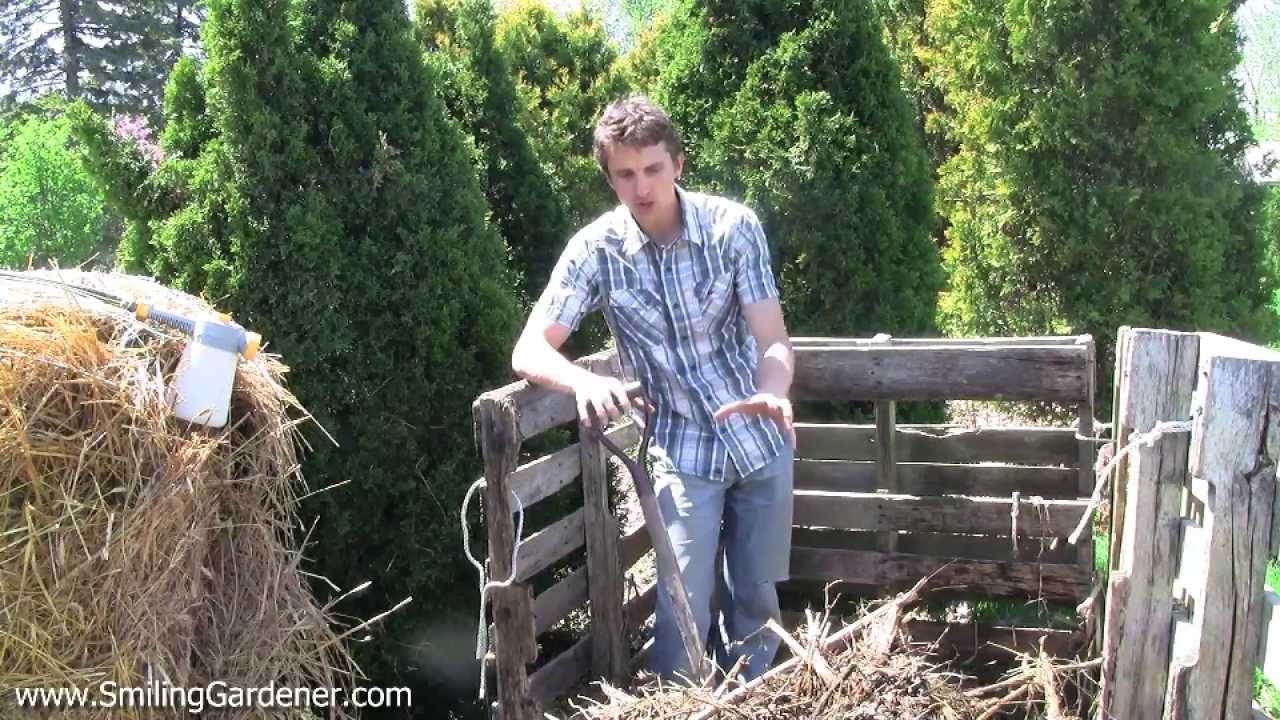
 This enclosure is a good size. I just hope there’s a way to get the compost out of there!
Although it isn’t always necessary, an enclosure can keep out critters, prevent the pile drying from wind and look a little tidier.
That can be made of used wood pallets or fresh wood, concrete blocks or anything else that holds the compost in place.
Some gardeners have two or three such enclosures for different stages of the pile, such as raw materials, in-process compost, and finished compost.
Compost is easy because microbes do the work. All we need to do is construct the pile to have the correct air, moisture, temperature and carbon to nitrogen ratio.
Air
Oxygen is important because we’re making aerobic compost. We want to make it favorable for aerobic microbes because generally, they’re the most beneficial.
It’s not that anaerobic microbes are inherently bad, it’s just that the way their metabolism works, they often give off gases that are toxic to plants.
Interestingly, the original Indore method perfected by Sir Albert Howard in India in the beginning of the 20th century, the foundation for how we compost today, was largely anaerobic because the pile was not turned very often.
Most compost piles spend some of their time anaerobic. In fact, properly made anaerobic compost has some advantages, such as less nutrient loss, and therefore has some strong proponents. Still, most composters are going to try to promote aerobic conditions some of the time, again, because it tends to product a better compost.
So the oxygen content should be at least 5% and preferably above 10%, although I don’t actually keep track of it.
There are two basic methods to ensure there’s enough air, and you can use either or both.
The first is to put a layer of brush, branches and sticks on the ground under the pile that is at least a few inches high.
Along with this, if I’m not looking for a finely screened compost, I’ll include up to 10% twigs in the pile. They won’t break down, but they will help with aeration. Depending on the end use, I may screen those out afterward, or not.
The second method is to turn the pile over once in a while.
You can turn it into a second bin or bring it out of the bin and back in again. For the fastest decomposition, this is done whenever the pile starts to cool down from its hot phase, usually every three to seven days.
Even turning a pile once each season is helpful. In fact, when I’m not in a hurry, this is what I do because while an unturned or little-turned compost pile takes longer to finish, it retains more nutrients.
If you don’t want to go through the trouble of turning the pile, using a pitchfork or other tool to introduce some air can help.
 I wouldn’t recommend a bin like this. It’s impossible to turn properly and there’s (probably) no way for air to get into the pile.
If you don’t want to turn, but need your compost to be done more quickly, you can put perforated pipe into the pile both horizontally and vertically, or even just put some poles vertically into the pile that you can pull out after the pile is made. You can use ABS pipe if you’re concerned about toxic PVC.
The fastest way to get it done, however, is to turn it regularly. A “hot” compost pile can be largely done in four weeks if the ingredients are small enough. Most weed seeds and pathogens can be killed in this time.
Many nutrients may be lost, but if you have enough materials, you can make a huge amount of compost in a year using this method. Of course, it’s a lot of work turning the pile and it does contribute many more greenhouse gas emissions.
Some gardeners want fast compost, but don’t want to turn the pile often. I don’t blame them.
In this case, you can spend more time ensuring aeration right from the beginning, using the method above and even building the pile one foot off the ground with a sturdy floor of wood and mesh.
If you don’t need as much compost or if you don’t want to do all of this turning, a slow compost pile has big advantages.
Not only does it retain many more nutrients, but research shows it’s more able to suppress disease, probably because more beneficial microbes survive the composting process, especially the fungi.
We can also allow the pile to go through a maturation phase, where it’s already looking like finished compost, but sits for another perhaps six weeks at a cooler temperature allowing many microbes to multiply.
This curing time is important to make the best compost.
 Giving the compost time to fully finish allows fungi and low- and medium-temperature microbes, which will be the most active in the garden, to multiply.
Many adherents and some research projects have concluded that the extra work involved in the very intensive management, such as turning several times a week, is not worth the effort. There are strong opinions on both sides.
Moisture
A compost pile should be moist like a wrung-out sponge.
This means when you take a fist full and squeeze it, it should feel wet but not drip water. This is somewhere between 30% and 70% moisture, with 50-60% generally considered ideal.
If it’s too moist, it can turn anaerobic and promote the wrong microbes, as well as leach a lot of nutrients. If it’s not moist enough, decomposition will be very slow, but this is a better problem than too much moisture, which takes more effort to fix.
You’ll probably need to have a hose handy while you build the pile so you can occasionally spray it with some water as you build it.
If the pile gets too moist or if it starts to smell bad, you can take it apart, air it out, and then add more carbon materials when you put it back together.
If it gets too dry, water it and perhaps apply more nitrogen materials. You may need to take it apart here, too, in order to get it sufficiently wet.
Some people cover the pile when it’s done. In a dry climate, it helps decrease evaporation and in a wet climate, it protects the pile from too much moisture.
I used to do that, but nowadays I leave it uncovered – I prefer looking at the pile rather than a tarp.
Actually, straw can direct water away from the pile if you put a layer on top, so sometimes I do that.
 Straw in a dense layer can repel water quite effectively.
Temperature
Compost goes through three stages of temperature that coincide with different microbes.
The easiest way to kill weed seeds and pathogens is to ensure the pile gets up to a certain temperature for a certain amount of time. If you want to get technical, you can buy a compost thermometer and measure the temperature to make sure you’re okay, or you can learn by experience.
Different studies have come up with different ideal temperatures, but it’s generally agreed that 130-150F (55-65C) for several days is adequate.
If you’re judging with your hand, it should be too hot in the pile to keep your hand there for long. We don’t want it to go above 150F because that degrades humus and humic acid complexes, as well as scaring off a lot of microbes.
Ideally, it would be allowed to finish for six weeks at cooler temperatures.
Still, significant reductions in pathogens have happened when the compost pile never went above 104F (40C). Even a cool compost, if well-made and left to mature, can control pathogens to safe levels.
To get the higher temperature, the pile should be at least 3 by 3 by 3 feet as a bare minimum, and as much as 5 by 5 by 5 feet, although some people even build 10 feet wide.
If you’re making a lot more compost, therefore, you can make a row that is 5 feet high by 10 feet wide by whatever length you have room for. At my parents’ tree farm, we used to have a compost “windrow” that was probably 50 feet long.
 Windrows are also used to dry hay after harvest, before baling.
The thermometer can also be used to tell you when to turn the compost, if you’re looking for fast decomposition. Turn it whenever it goes below 104F (40C) or if it gets too hot at 150F (65C).
Compost that gets too hot will lose even more carbon as carbon dioxide than usual, or as methane if the pile is anaerobic.
Nitrogen is lost as ammonia and other compounds, and sulfur as hydrogen sulfide — one of the highly toxic “sewer gases” that makes a poorly built compost smell bad.
For the most part, the more frequently a pile is turned, the hotter it tends to get and the hotter it stays, although the most important part of reaching high temperatures is the right amount of moisture, proper pile size, and balanced carbon to nitrogen ratio.
That being said, if the pile stays hot for months and is rather wet, that probably means it’s anaerobic.
Carbon to Nitrogen Ratio
If a pile has too much nitrogen, it may turn anaerobic, create bad compost and smell awful. Some people still feel that too much nitrogen is better than too much carbon as long as it doesn’t smell.
On the other hand, some people feel that too much carbon is better because it will still compost, albeit very slowly over several years, but at least it shouldn’t go anaerobic. If the pile doesn’t heat up, you may need to add more nitrogen materials.
The ideal carbon to nitrogen ratio of a new pile is somewhere between 25:1 and 30:1, by weight, not volume.
We don’t have to get it exactly right, but that’s what we’re going for. The way to get this ratio is to use between two and four times as much carbon materials as nitrogen materials. If you’re using very high-carbon materials like sawdust and wood chips, you may even end up using an equal volume of nitrogen and carbon materials.
 If your wood chips have large particles, they may take a long time to break down at any ratio, because they can only be decomposed slowly by fungi and actinomycetes instead of fast-acting, heat-loving bacteria.
If you have a lot of chicken manure and food scraps with their very low carbon to nitrogen ratio, and aren’t using too many very high carbon materials like sawdust, you may use four times as many carbon materials as nitrogen materials.
By the end of the composting process, the ratio in the pile goes down to somewhere around 10:1, because carbon is released as carbon dioxide.
Incidentally, this end ratio is approximately what the soil needs, too.
Building the Pile
There are many variations on how to build a compost pile. Here is how I do it, step-by-step.
This is for a 3 by 3 by 3 foot pile that makes a 1 square yard or 27 square feet pile of organic matter, but if your pile will be going through a cold winter and you can get enough materials, you might go for a 5 by 5 by 5 foot pile.
Build it in an area with lots of room so you can get in and out of the bin and turn the pile, and make sure your hose can reach it. If your city uses a lot of chlorine in the water, it may be better to use rainwater to moisten the pile, but city water will do.
I build my pile all at once in order to create the best possible pile.
It doesn’t work as well to just throw scraps in as they come because it’s more difficult to get the mass required and the correct C:N ratio, so I make sure I have all of my materials ready at the start.
If you’re generating compostable materials like garden waste and food scraps high in nitrogen on a more continuous basis, they can be occasionally put in the pile without changing the C:N ratio too much, although it’s nice to have a carbon material to add at the same time, such as straw.
 “Darth Vader” style home bins like these are often meant for slow, continuous composting of garden wastes, but there’s often not enough air, so this can be a recipe for anaerobic decomposition.
I tend to use manure, kitchen scraps, leaves, wood chips and straw as my basic materials, along with whatever other organics I can get, such as waste from a brewery, orchard or winery. The composting process will be much faster if big materials are shredded or chopped, but if chopped too fine, the pile will go anaerobic.
I tend to place my pile in the sun, although this isn’t crucial. If I lived in a hotter climate, I would probably place it in the shade.
I build my pile right on the ground to invite earthworms and other soil insects up into it. I water the ground first and put a base layer of branches and brush three feet wide and long.
Some people like to build in layers. I just take turns putting carbon and nitrogen-rich materials into the pile.
I usually put two or three shovels of carbon material for every shovel of nitrogen material.
 Garden waste usually falls somewhere between a “green” and a “brown.” In general, woodier material is higher in carbon, while soft, green bits are higher in nitrogen.
I may also try to have a carbon layer on all sides of the pile to control odor and discourage animals and flies from hanging out around the compost.
I occasionally sprinkle in my activators throughout this process, and hit the pile with some water every once in awhile.
These activators may include any of the following: compost, humates, clay, EM, sea minerals, liquid kelp, rock dust, calcitic lime, gypsum, other mineral fertilizers, urine, and biodynamic preps and other energizers.
If I have any metal poles or long, broken shovel handles around, I stick them vertically into the pile and pull them out after the pile is made.
I top it off with a layer of leaves or straw and tarp it during the rainy season or the sunny, hot season to decrease evaporation. I also like to make the compost pile a centerpiece in my garden and in that case, I don’t like having an ugly blue plastic tarp on top. The straw will keep moisture and wind out.
If I’m in a hurry, I turn this pile every three to seven days. Otherwise, I turn it every three months or so, except winter. I may put food scraps into the inside of the pile once a week, adding some carbon material at the same time.
If the compost isn’t working or smells bad, it could be the wrong moisture balance, not enough air, too small size, or an improper carbon to nitrogen ratio. The pile will shrink by as much as 75% by the time it’s done.
Summary
- Ensure sufficient air by putting sticks and brush on the bottom of and even throughout the pile, and then by turning the pile, and generally keeping it a maximum of five feet wide and high.
- A pile should be kept at about 50% moisture, like a wrung-out sponge. Control the amount of water that gets in with a cover or straw on the top and have a hose nearby to add more as needed.
- Proper temperature is achieved by making the pile big enough, using a good ratio of carbon to nitrogen, and turning the pile when it gets too hot or cold.
- A starting carbon to nitrogen ratio of between 25:1 and 30:1 is usually achieved by using between two and four times as much carbon materials as nitrogen materials by volume.