Home Soil Inspection
Inspecting your soil isn’t particularly complicated, but there are some things you need to know to do it right.
Some of the simple tests we can do on our own, and the more difficult nutrient testing we should leave to a soil lab that can do a much better job (I’ll cover this next time).

The goal of this lesson is to outline a simple process for soil inspection.
Many of the steps can be done annually, as the real benefit of inspection comes from comparing results from year to year to see if what you’re doing is working.
What exactly should we look at?
Ideally, we would like to have some information about the texture and structure of our soil, the mineral content, and the health of the soil food web. We can record this in a simple garden diary.
This is one of the hardest things to get gardeners to do, but please, please, please start a garden diary. Not only can you keep track of what you plant every year, but you can takes notes on your soil testing process and results.
Look at the Soil
The easiest test, and arguably the most important, is to spend just a little bit of time getting acquainted with your soil firsthand.
If you’re like many people, reading about this kind of stuff is more fun than doing it. It’s easier for some of us to learn this than to put it into practice.
It took me a while to get into this because I’m a mathematical person who likes to look at the numbers in a soil test, but playing in the dirt is a vital step I’ve come to cherish. You need to actually go outside and do this to get any benefit from it. Find some kids to help you. They love digging around in the soil for earthworms.
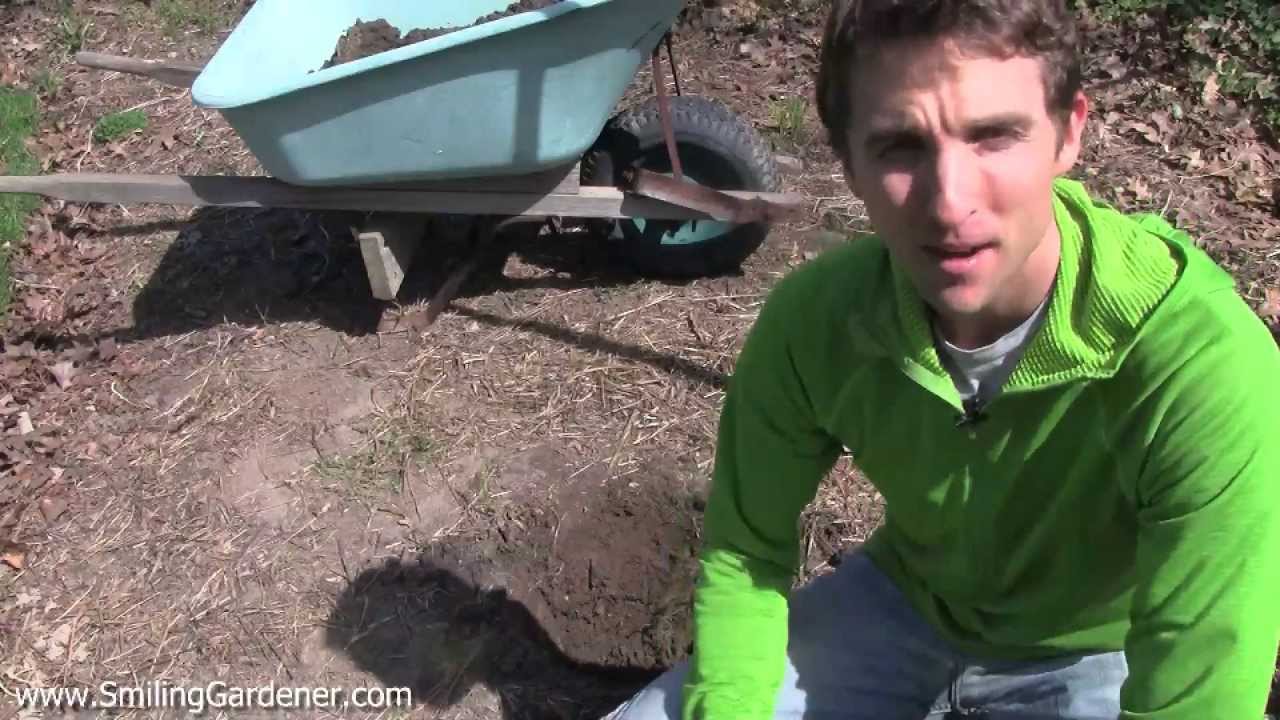
Dig a hole approximately 12 inches long, wide and deep. Try to take the soil out in big chunks if possible and place it in a wheelbarrow or on a tarp.
 More technical tests can be useful, but it’s always great to feel the soil with your own hands.
First of all, how easy is it to dig? It should get easier every year as your organic matter content increases, your soil food web grows and your nutrients get more balanced. Take note of how easy it is to dig, or rate it on a scale of 1 to 10. That way, when you can stick your arm down into the soil up to your elbow after 10 years, you’ll remember where you started.
Look at the color of the soil. Dark brown is good. Pale beige, gray or blue is generally not as good. Smell it, too. Soil should smell pretty nice. It definitely shouldn’t smell bad, like rotten eggs. Does it look like something you’d want to grow plants in?
You can use half a cup of soil to determine your soil texture — the relative amount of sand, silt and clay in your soil. The sedimentation test from the all about soil lesson is my favorite, although you can judge just by manipulating some soil in your hand, as in the ribbon test, also from that lesson.
This information gives you a clue about the water and air conditions in your soil. It also gives you a hint as to its ability to hold onto nutrients.
Look at the soil you’ve taken out and make some notes about its structure. It takes some experience to do this, but it’s really just a subjective, qualitative assessment of how your soil looks.
A good sign is if the soil particles are aggregating together in some way, rather than staying separate like sand on the beach. You also don’t want huge compacted clumps of clay.
 You can see how this soil aggregates together in unevenly sized clumps, with lots of organic matter.
Another method of looking at structure comes from Graham Shepherd’s Visual Soil Assessment, a very good free guide for looking at your soil that you can find online.
Try to dig an eight-inch cube of topsoil and drop it a maximum of three times from waist height into a bucket with a firm base, even with a piece of wood inside to help break up the cube. Put the broken soil pieces and all of the fine soil from the bucket on a large plastic bag. Some of the big clods will be cracked and you can break those apart at the cracks.
Then organize your soil from big clods to small clods. The more fine soil and fewer clods you have, the better. A good soil is mostly broken down into fines, whereas a poor soil stays mostly big clods. It’s okay if yours is mostly in big clods because you’re going to improve it over the next few years.
Break up the remaining soil and count the earthworms.
There are a few geographic areas that don’t have earthworms, and very sandy soils are often low, but most garden soils should have some. Earthworms are sensitive to their environment and chemicals, so if you have them it’s a good sign. If you have 10 in that square foot of soil you’ve pulled out, you’re doing okay. More is even better. I’m thrilled when I can find 25 of them in an eight-inch square soil cube.
You can also look down at your soil for other insects.
If you have a mulch layer, peel it back and see what’s living there. A magnifying glass helps with this. You may even be able to see fungal mycelium, especially around plant roots, and if you have nitrogen-fixing plants like peas and beans, you should be able to dig up a plant and find the tiny spherical nodules that house the bacteria on their roots.
Look into your hole. Do you have a defined topsoil level that is darker than the soil below? The darker it is, the more organic matter content. Measure that darker layer.
Unlike in conventional agriculture, where the topsoil and organic matter have rapidly decreased over the last 50 years, we’re going to increase yours over the next few years, so it’s nice to know where we’re starting.
 Industrial agriculture “mines” the soil, treating it like a non-renewable resource rather than a living community.
Did you dig in an area where there were some roots?
The deeper they go, the better. If they’re stopping at a certain depth and growing sideways, there may be a hardpan there that we will slowly break up when we plant strong, tap-rooted plants and when we increase the organic matter content of the soil. A lack of fine root hairs in your soil profile will indicate a lack of oxygen.
pH
We’ve already seen how knowing the pH of our soil isn’t all that useful, other than as one of the indicators that shows if our practices are moving our soil in the right direction, often toward a balance point somewhere between 6 and 7. I wouldn’t even worry too much about that.
Actually, one of the main reasons I wouldn’t worry is because soil pH fluctuates substantially over time — not only throughout the seasons but over the course of a matter of days.
Temperature, moisture, biological activity — all of these have an effect. Often pH tests give wild swings of up to 2 points over a 24-hour period. You’ll get a pH number on a professional soil test, and that’s where I leave it.
Soil Biology
If you’re a market food grower, you may want to know how many microbes you have in your soil and how diverse they are.
You can get a microscope and learn to do some of this yourself, or you can have a lab such as Soil Foodweb do it.
 It’s easier to control potential contaminants in a laboratory setting.
It’s about $60 for a basic test that covers bacteria and fungi, which is a good start. You can pay over $200 to include protozoa, nematodes and mycorrhizal fungi.
The only reason to do this kind of testing is if you’re prepared to act on the results, and that means balancing out your soil food web.
That involves learning how to make specific composts and compost teas that select for specific kind of microbes. This is a lot of fun, but I understand that most home gardeners won’t want to jump into it. It’s worthwhile mainly for landscapers and people who grow a lot of food.
I may do biology testing on a new garden if I know I’ll be gardening there for a while. Otherwise, I just go ahead and make the best compost and compost tea I possibly can, albeit not as specifically suited to the soil as it might be based on testing.
I think soil mineral testing is more important. The reason I include biology testing here is because I feel there’s a good chance that many of us who currently test our soil minerals will one day be testing our soil biology too.
Plant Testing
There are a couple of methods of directly measuring the health of your plants with instruments. Just as with soil, before you get to these more technical tests, it’s very important to simply look at your plants and take some notes.
You can look for insect predators and diseases as indicators of plant sickness.
A little more advanced, you can look for leaf discoloration that indicates certain deficiencies.
I don’t use this is my only means of determining deficiencies because I think it’s more complicated than that, but it’s useful to compare these indicators with other plant and soil tests.
Here are some examples of visual deficiency indicators:
A calcium deficiency can produce many symptoms, including thick, woody stems and cell death at the base of the leaves.
A nitrogen deficiency often causes the leaves to be a pale yellow-green color. A sulfur deficiency does this, too.
 Many deficiency symptoms look very similar: these raspberry leaves are probably iron deficient, which is characterized by yellowing between the leaf veins, with a sharp distinction between veins and chlorotic areas in young leaves.
A phosphorus deficiency can show up as a purplish color on the lower leaves and as overall stunted growth.
A potassium deficiency often shows up as yellowing and cell death around the edges of the leaves, or in between the veins. A magnesium deficiency often looks like this, too. You can see that it’s not always easy to pinpoint specific deficiencies since they often look the same, but it’s a useful start when you’ll be comparing with other tests.
It’s also possible to measure plant “brix” and make some decisions based on that, which I’ve written about here: What Is Brix?
Summary
- A valuable test is to simply dig a hole and note the ease of digging, color, smell, texture, structure, earthworms and insects, topsoil layer, and root growth.
- Soil biology testing will be making its way into the mainstream and is helpful in giving guidance on what kind of compost and compost tea you should be making.